
Neck and shoulder stiffness is probably the most common complaint we hear about these days. If you spend hours at a desk, look down at your phone constantly, or just carry a lot of stress, you know exactly what we’re talking about.
The thing is, this kind of pain doesn’t just show up overnight. It builds up slowly from poor posture, mismatched desk heights, sleeping wrong, or even chronic stress that keeps your muscles constantly tight. And honestly, if you ignore it or handle it wrong, it just keeps getting worse until it seriously messes with your quality of life.
We’ve put together a complete method that you can do entirely by yourself. It’s gentle but effective, and it works on releasing the tight muscles while actually helping restore your natural neck curve.
Understanding Your Neck and Shoulder Connection
Before we jump into the method, it helps to understand what’s actually happening. Your neck and shoulders are connected by layers of muscles and connective tissue called fascia. When these get tight, they pull on each other, creating that stiff, painful feeling.
The good news is that once you know how to release these connections properly, relief usually comes pretty quickly.
What You’ll Need
Actually, not much at all:
- A comfortable place to sit
- A warm water bottle (room temperature or warmer - never cold)
- A small towel
- About 15-20 minutes
- A bed or yoga mat for the final step
Don’t have a helper? No problem - this entire method is designed to be done alone.
The Complete 3-Step Method
Step 1: Release the Shoulder-Neck Connection
This first step targets that tight area where your shoulder meets your neck. It’s where a lot of tension gets trapped.
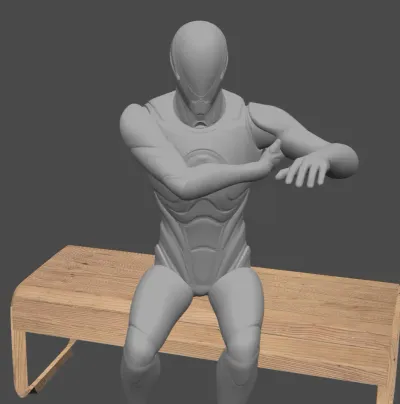
Find a comfortable spot to sit with your back straight and feet flat on the floor. You want to feel stable and relaxed.
Lift one arm up, then use your other hand to grip firmly around your armpit area. Your thumb and fingers should form a strong grip around the muscle that connects under your arm. Now pull down firmly - you’re trying to stretch and release that connecting tissue. Do this 10 times, then rest for about 30 seconds before switching to the other side.
What you’re doing here is releasing the fascia and muscle connections that get tight from hunched shoulders and forward head posture.
Step 2: Work on Your Neck Muscles Directly
This is where we use three different techniques: pinching, dragging, and tilting. Each one targets the neck muscles in a slightly different way.
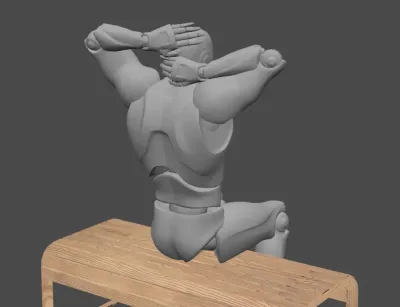
The Pinch Technique: Lift one arm and place that hand behind your head. With your other hand, reach around and firmly grip the muscles at the back of your neck. Really pinch up the muscle and pull it back toward you. Do this 5 times, then switch hands and repeat 5 more times.
The Drag Technique: Keep the same hand position, but this time instead of pinching, you’re going to press your palm flat against the back of your neck and drag it sideways. If you start with your right hand, drag toward the right. If you start with your left hand, drag left. The key is to move your skin and the muscle underneath it together. Do this 5 times, then switch hands.
The Tilt Technique: Same setup as the drag, but now you’re adding a head tilt. As you drag your hand across the back of your neck, tilt your head back about 30 to 45 degrees. This adds an extra stretch to the muscles. Five times each hand.
By now your neck should feel noticeably looser.
Step 3: Lock in the Results and Restore Your Natural Curve
After the first two steps, your muscles are relaxed, but now we want to help your neck curve return to its natural, healthy position.
Grab a water bottle and fill it with warm water - not hot, just comfortably warm. Wrap it in a towel so it won’t be too intense against your skin.
Lie down on your bed or a yoga mat and place the wrapped bottle right at the back of your neck, where your skull meets your neck vertebrae. Let your arms rest naturally at your sides and just stay there for about 10 minutes.
What’s happening here is that the gentle warmth helps keep your muscles relaxed while the bottle provides support that encourages your neck’s natural curve to return.
When your 10 minutes are up, slowly sit up. Don’t rush this part - give your body a moment to adjust.
Tips for Better Results
Here’s something important that most people don’t realize: holding the same position for hours creates enormous pressure on your neck and shoulders. Your muscles basically turn into concrete, which is why you end up in pain.
Try to get up and move around every 30 minutes or so during your workday. Even just rolling your shoulders or turning your head side to side helps keep things loose.
What to Expect
Most people feel a significant difference right after doing this routine. Your shoulders should feel less heavy, your neck should move more freely, and that tight, achy feeling should be much better.
Common Questions
When should I do this routine? Honestly, whenever you have time. There’s no specific best time - morning, afternoon, evening all work fine.
My neck curve is already pretty messed up. What should I do? If your neck has developed a significant curve problem or you’re dealing with chronic pain, you should probably get X-rays and talk to a healthcare provider. Don’t try to self-treat serious structural issues - if there’s nerve compression or other problems, you need professional help.
Making This Part of Your Life
The best approach is to make this routine a regular part of your week, not just something you do when you’re already in pain. Prevention is so much easier than treatment.
And remember, small changes in your daily habits make a big difference too. Better posture, regular movement breaks, and managing stress all help keep your neck and shoulders feeling good.
This method has helped a lot of people over the years, and it’s completely safe to try. If your pain persists or gets worse despite trying this, that’s when you should consider getting professional help. But for most everyday neck and shoulder stiffness, this should get you feeling much better pretty quickly.